If you have specific sections of your Flipbook or if your Flipbook is particularly long, you can use Flipbook Tabs to give your end users direct access to those sections while using the Flipbook (the Tabs feature is only available for Pro packs).
Step 1 - Access Page Editor
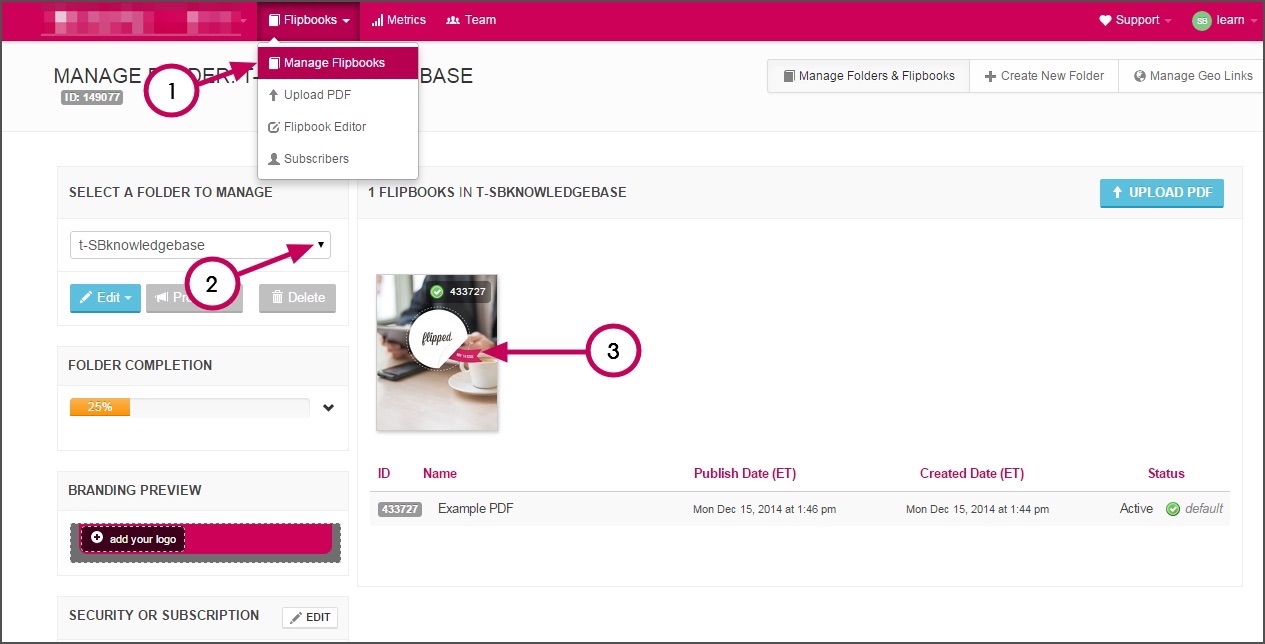
To access your Page Editor, select a Flipbook from the 'Manage Flipbooks' section of your account (see images below).
While logged in to your Uberflip account, go to Flipbooks > Manage Flipbooks. Select a Folder to manage and click on a Flipbook cover image to edit that Flipbook.

From there, just select the blue Load in Page Editor button under Flipbooks Options > Enhance on the popup that appears.
Step 2 - Access the Tabs Creation Tool
Once in Page Editor, click the Tab icon to create your Tabs. Follow these steps (which reference the screenshot below):
(1) Click Tab Icon
Click the Tabs icon from the list at the top right corner of your screen.
(2) Tab Label
Give your Tab a label. This is what your users will see.
(3) Page
Select the page where your Tab should direct users to (i.e. the start of a chapter)
(4) Tab Color
Give your Tab a color.
(5) Save Tab
Click Save Tab.
Step 3 - Add New/Edit Tabs
When you click the Tabs icon in Page Editor mode, you'll see the option to Add Tabs or you can click the pencil icon beside your existing Tabs to make changes.
That's it! You've added Tabs to your Flipbooks and should now be in your Flipbook.
Notes on Tabs:
- Text limit for each tab is between 16-20 characters (depending on the width of the characters used)
- Side tab text does not wrap or shrink to fit. Any characteres over the limit will not be displayed within the tab
- Due to limited size of the edge of a page, tabs will begin to overlap if adding more than 10 tabs and may not be optimal for display. Once tabs overlap, a mouse hover of the tab will reveal the full tab and its text
VIDEO TUTORIAL

Comments
0 comments
Please sign in to leave a comment.