An Introduction to User Groups
Managing your Team just got easier!
User Groups make it easy to customize your team’s roles by setting permissions on a Group level. Use An existing group such as 'Content Manager' to assign default permissions like editing and publishing content. You can also create new groups specific to your organizational needs. For example, you can create a "Social Media Coordinator" Group and assign the permissions to share content but not be able to edit or delete content.
Users added to multiple Groups will receive the permissions of each group. Removing a member from that group with remove the related permissions.
For example, if you add a User to the 'Sales Rep' Group and the 'Analyst' Group then this user will have the ability to use Sales Streams and also see the corresponding metrics. Alternatively, you could create a new User Group called 'Sales Team Leads' and include both access to Sales Streams and visibility of Metrics in their permissions.
Creating a Group
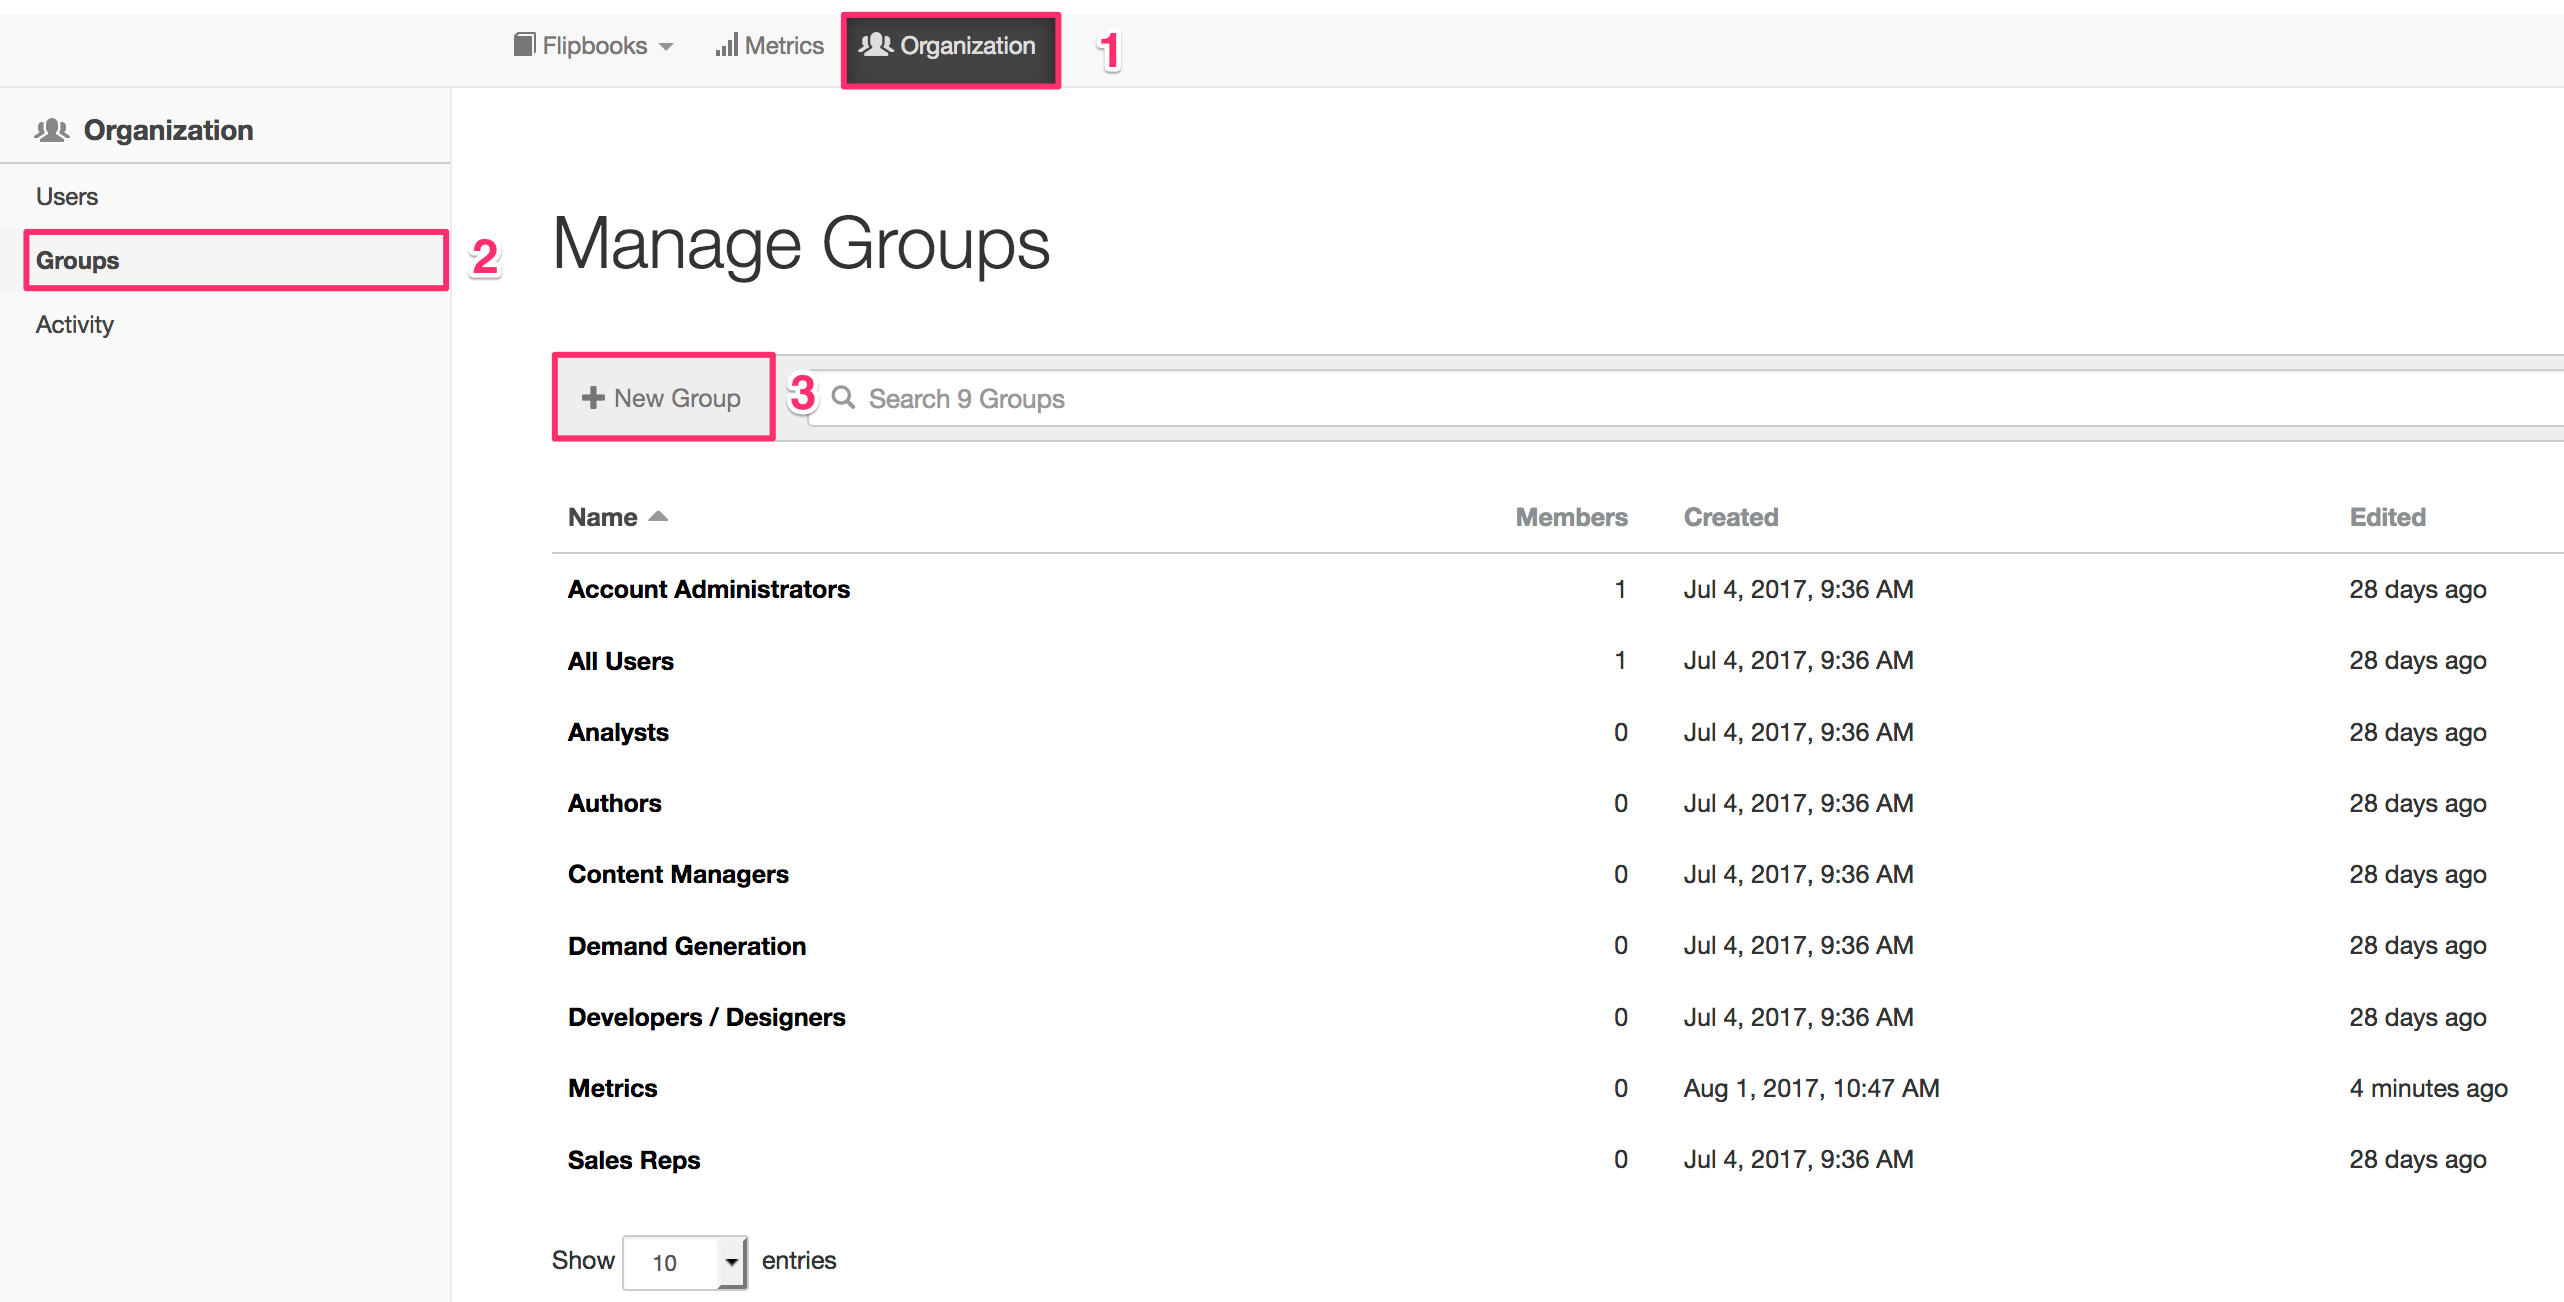
Step 1 - Select the ‘Organization’ Button
Step 2 - Select the Groups tab on the left side menu
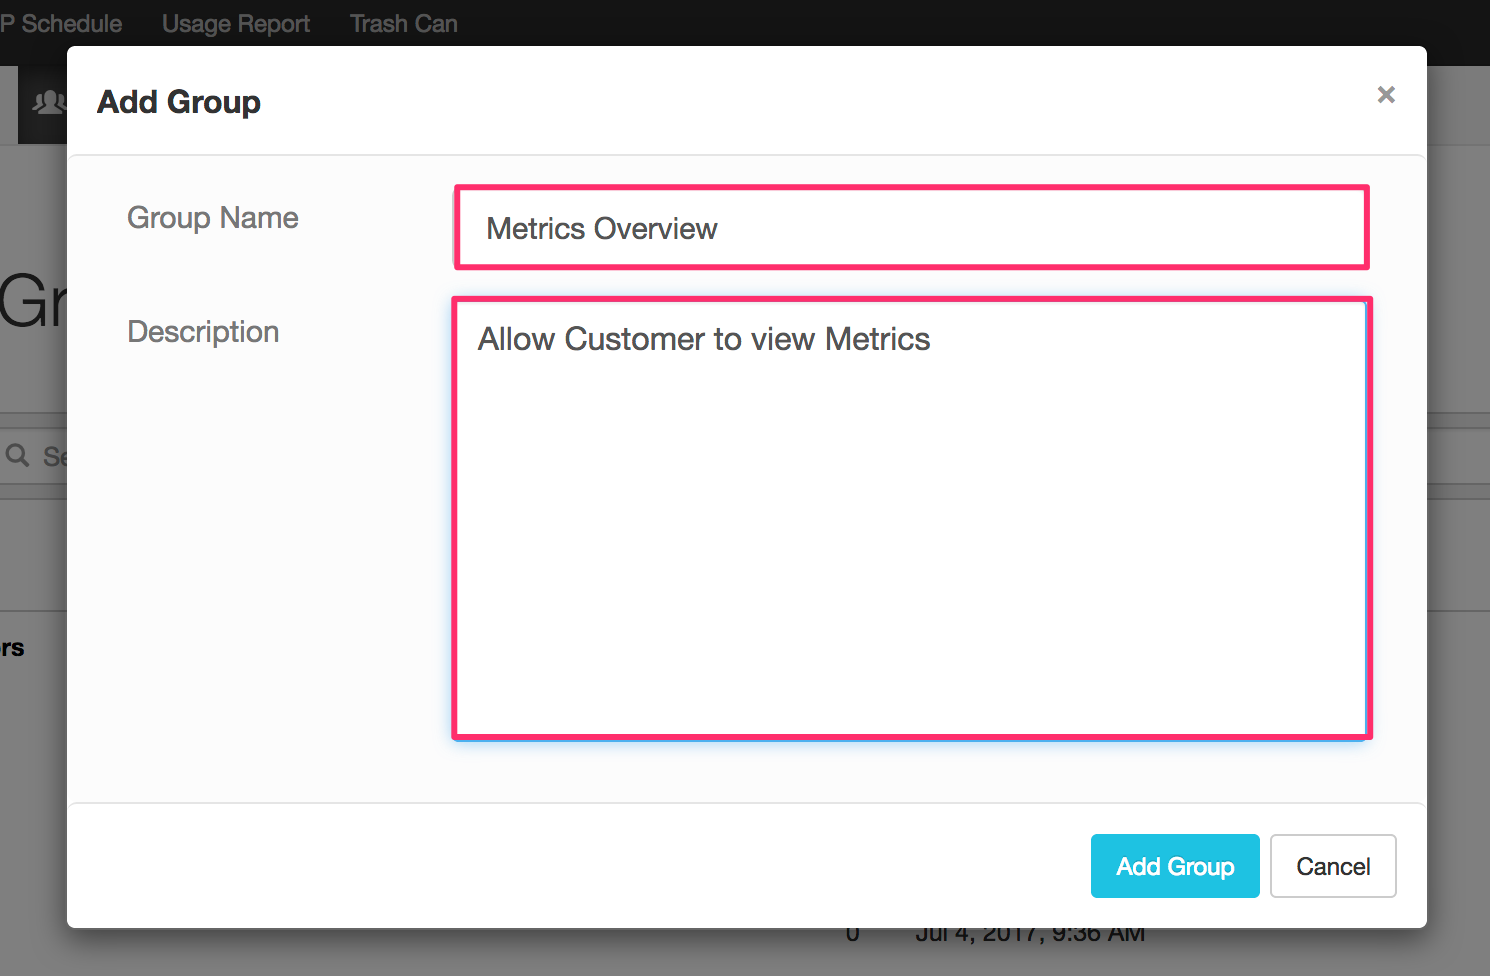
Step 3 - Click to Add a New Group


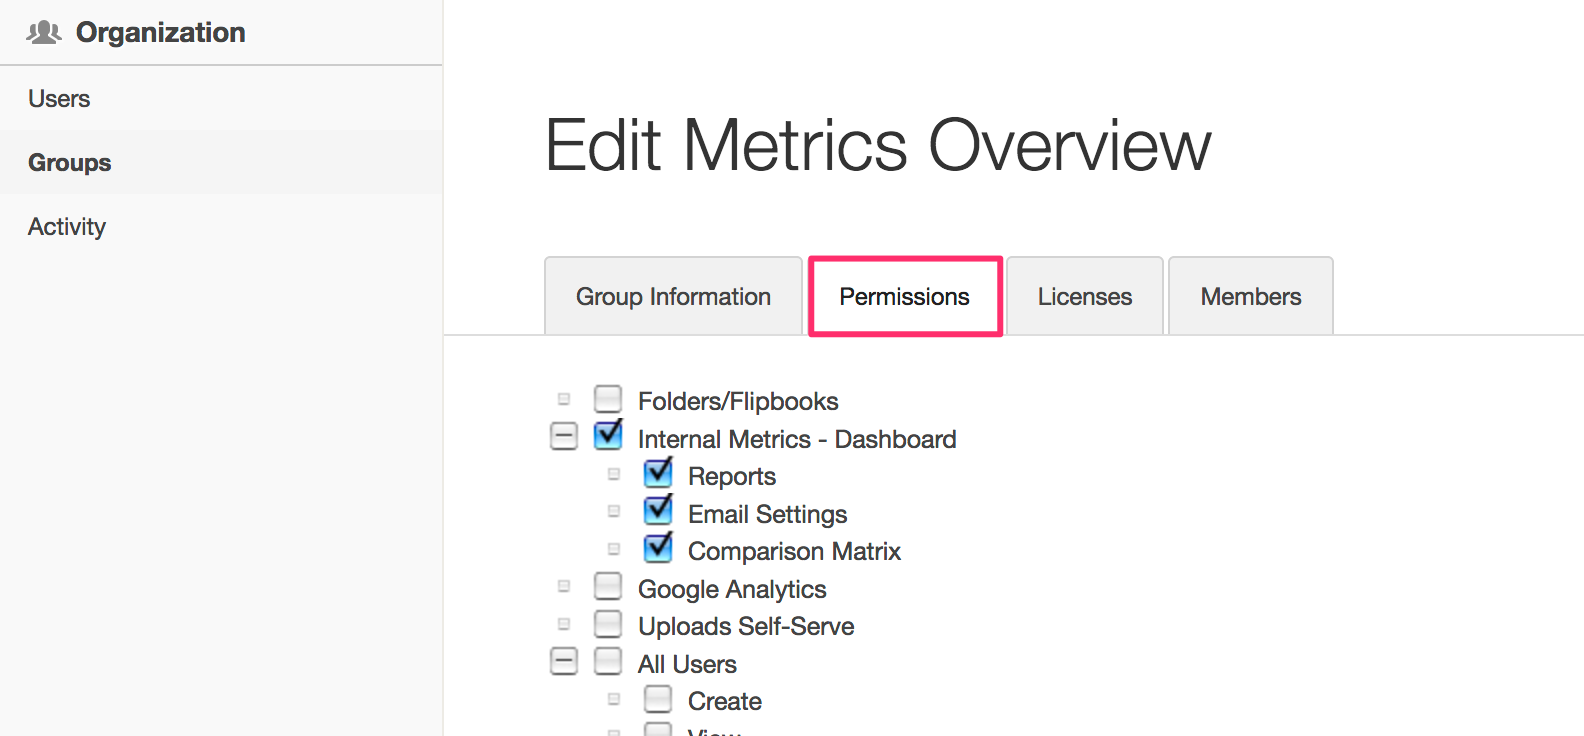
Step 5 - Choose the permissions for the Group. If users are members of multiple Groups they will receive the permissions of each Group.
Step 6 - Select the ‘Members’ tab to start adding your team members into Groups

Adding Members to a Group
Step 7 - Click ‘Add New Members’
Step 8 - Search for existing users
Step 9 - Select the user to add them to the ‘Selected Users’ pane
Step 10 - Click ‘Add to Group’
Creating a New User
Step 1 - Select the Users Tab
Step 2 - Click + New User
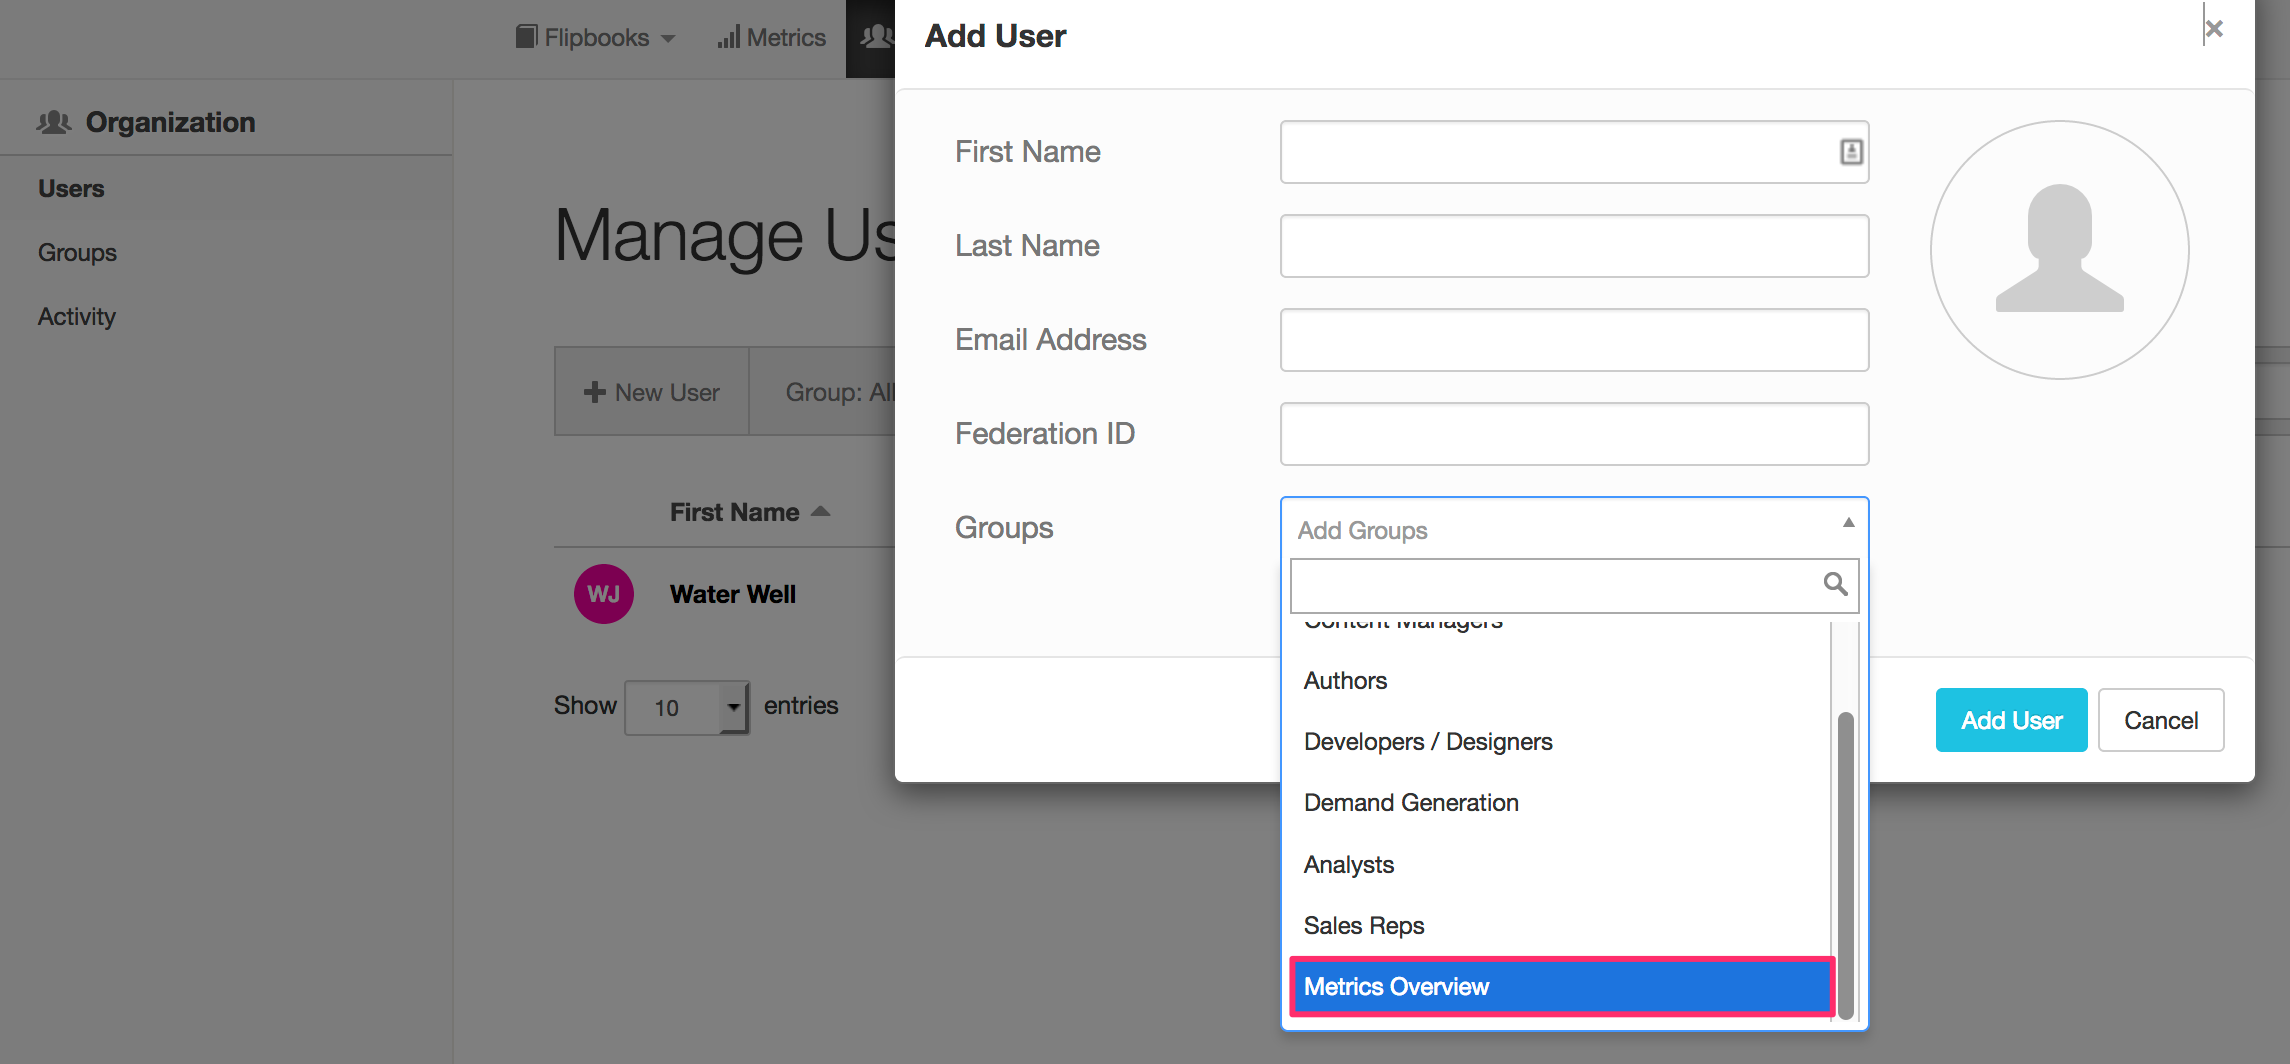
Step 3 - Enter email, first name, last name and select the Groups you want them to belong to (remember: a user can belong to as many Groups as you wish)


Comments
0 comments
Please sign in to leave a comment.